Showing posts with label tutorial. Show all posts

Sunday, July 15, 2018

Long Time Gone

I haven't blogged since February.  Wow, time flies.  I hardly know where to start.

 It's been a very long 6 months.  I mentioned in my last post that our son was ill and had surgery.  Well, his recovery took way longer than we thought.  He finally came out of it by May/June.  During that time, my husband was traveling a lot.  And when he was home, he was sick.  (one of the joys of flying these days)  I got something too, that took me too long to recover from.  Like I said, not a good 6 months.  And I was so busy and/or sick, I couldn't get any sewing in, or blogging or anything to blog about.  So, I was quite frustrated.

However, in May I took the trip of a quilter's lifetime!  I took a trip with my California friends and guess where we went?


Yup, we went to Missouri to visit Missouri Star Quilt Company, and about 6 or 7 other quilt shops, some in Missouri and a few in Kansas.  OMG, that was sooo fun!  Needless to say, I've shot my fabric budget for the year!


This was one of our 1st stops.  Harpers Fabric & Quilt Company, in Overland Park, Kansas.  This was a great shop and we all bought fabric here.  Actually we all bought at least something in every shop we visited!  I love the quilt on the bed.
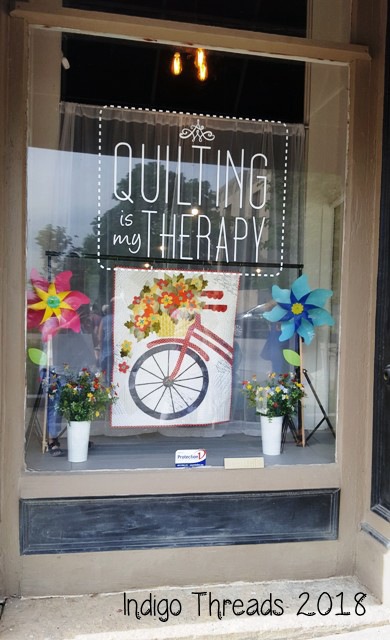

I think our last stop on Thursday was Angela Walters' shop Quilting Is My Therapy in Liberty, Missouri.  If you've seen The Midnight Quilt Show, you've seen Angela.  We were hoping to get to meet Angela in person, but sadly, she was at Quilt Market at the time.   


This was our group at breakfast on Friday as we were about to go to Missouri Star.  I think you can tell how excited we were!


When you first walk into the main building of MSQC in Hamilton, MO, this is what you see.  A display of the latest weekly tutorial from Jenny, as well as any Daily Deals.


And this was the new display on Saturday.  We were hoping to meet Jenny while we were there, but again, she was at Quilt Market.  Bummer!
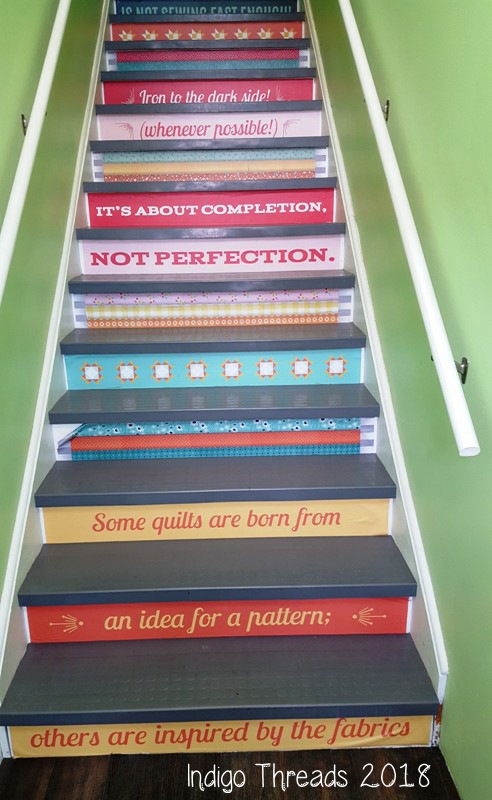

This was the stairs up to one of the shops in another of the MSQC buildings.  I thought it was real cute.

By the way, we found out that JC Penney grew up in Hamilton.  His childhood home was just down the street a little ways from MSQC's main building.


We stayed at a hotel in St.Joseph, MO.  We learned that it is the home of the Pony Express.  It ran from St. Joe all the way to Sacramento, Calif.  This is a mural across the street from the museum.  The museum was fun and also educational.  Just down the street from here was Jesse James' childhood home.  We didn't get to see that, as we had to head back to the airport.

If you ever get the chance to go to Missouri Star, I urge you to go!  It was so fun, everyone was so nice and Missouri is a beautiful state!


I know I mentioned in my last blog post that I was doing an on-line swap of wonky stars.  This is just about half of the stars I received.  Aren't these fun?  I haven't yet gotten a photo of all of them together.  I've got two quilts to finish and then I want to start working on this.

I mentioned on my last blog post another swap I was going to do this spring, the 6 inch Churn Dash block swap with Barb of Fun with Barb blog.  


Here are my 4 different fabric runs for the blocks made for the Modern group.  We had to use at least 2 different fabric pairings.  


After lots of cutting and sewing, here are all 54 of my Churn Dash blocks ready to swap!  

If you're interested in making some 6 inch Churn Blocks for yourself, here is the link to Barb's tutorial for them.  Actually, the tutorials for all the blocks for all the swaps are on this page.  The Churn Dash blocks are at the bottom of the page.


Here are all of the blocks I received in the swap, laid out in color order.  Aren't they wonderful?  Rainbow order always makes me happy!  A huge Thank You to my swap buddies!

I plan on being back soon, as I still have more to share with you.  Have a creative week!

Monday, July 04, 2016

The Twin Sister block - a Tutorial

This is my American Independence Day gift for you!  Happy 4th of July to all my U.S.A. readers!

I wrote this tutorial for the Tacoma Modern Quilt Guild, that I belong to, and I thought I would share it with you too.

12 inch Twin Sister block

This block is called the Twin Sister block, among other names.   This tutorial will make a 12 inch finished block.

Cutting:

* Red (background) – 1 square at 7 ¼ inches, then cut square into quarters from corner to corner, as in the diagram.

one 7 1/4 inch square, quartered

 * White – 2 rectangles at 4 ¾ inches by 9 inches
The white fabric can be solid white, white on white, or white with a blue or red print on it.

* Blue - 2 rectangles at 4 ¾ inches by 9 inches
The blue fabric can also be a solid or blue with a white or red print on it.

Think patriotic!

2 blue and 2 white rectangles

Sewing:

Place a red triangle on top of each blue and each white rectangle:


Sew the triangle to the rectangle along the long side of the rectangle, stopping at the end of the triangle.

sew with a scant 1/4 inch seam

your unit should look like this

Press the triangle open, with the seam allowance towards the rectangle.  Repeat for all four rectangles and triangles.

Each rectangle now has a red triangle sewn to it.  Sew one white rectangle to one of the blue rectangles in the following manner:   Match the rectangles when sewing them together, orienting them so that the short side with the red triangle attached on the blue rectangle is matched to the long side of the white rectangle without the red triangle attached, as in the diagram below.


The finished unit should look like this.
Press the seam allowance to one side. 

Repeat this step with the other two rectangles.

Note that the second unit needs to be oriented the same way as the first – if you sewed the short end of the blue rectangle to the long end of the white rectangle, you must do the same for the second unit, or your units won't fit together correctly.


This is what you should have at this point: two units oriented and sewn the same way.

Match the center points and sew the final center seam.  Press seam allowance to one side.

Your block should now look like this.

Your block should measure 12 ½ inches across.  A little larger is okay too.  You can trim all the blocks to the same size before assembling them into a top,

my block came out a little over 12 1/2 inches across

You’re now going to trim the excess off of those long rectangles, like so.


Just carefully line up the ruler with the outside edge of the red triangle and trim away the excess.  Save that triangle!


The last step is to set your machine to a long basting stitch and stay-stitch the edge of those long rectangles.  The outside edges of the rectangles are now on the bias and the stay-stitching will keep them from stretching until you can sew them together.  Remember to handle these edges with care.

stay-stitching

You can use those triangles you just cut off the block to make pinwheels or other units to be used in the border of a quilt, or to make a small doll quilt or tablerunner.


If you use my tutorial to make a block (or several!), please leave me a comment to let me know if you liked it.  And I would love to see what you made!

Please remember that all photos are copyright of by Indigo Threads.  If you share this, please give me the credit for this tutorial.  Thank you! 


Have a fun and safe holiday!

Sunday, January 13, 2013

Making Vanilla

Here I go with my first tutorial, and wouldn't you know it, it has nothing to do with quilting!

Did you know you can make your own vanilla extract?  And it's not only less expensive than the extract you can buy in the store, but it's much tastier.  And, best of all, it's super easy to do!

I've been making my own vanilla for about 30 years now!  Back in the early 1980's my mother sent me a bottle with a vanilla bean inside it and the recipe to make my own vanilla on the label.  It was so easy and so good, I've just kept on doing it.  I've even made vanilla in fancy bottles and given it to friends and family for Christmas presents.

You will need:
* a vanilla bean, which is available in the spice section of your local grocery store, although I found it for less money at Amazon.com

* sugar

* vodka.  The vodka doesn't have to be expensive.  Matter of fact, I've only ever used the cheap store brand.  And none of those fancy flavors.  You want plain vodka for this.

* A bottle to make the extract in.  You could use the bottle that the vanilla bean comes in, or you could find a fancy bottle.  It just needs to hold 5 or 6 ounces and have a tightly-closing lid or cork.


Take the bean out and break it in 3 places, then place it in the bottle you're using to make the extract.  My bean is broken more than that because I've used it a number of times before. You can actually use it to make extract about 4 times before it's exhausted.


Then, you need to add 1/3 teaspoon of sugar.


Next, add 3 ounces of the vodka.


Put the lid on tightly and shake the bottle.  That's all there is to it.  Easy peasy!  See all the little specks of vanilla floating in there?  That's what makes it so yummy!

You'll need to shake the bottle at least once a day, and let the mixture steep for one month.   As it steeps, it will darken in color until it looks just like the extract you've always bought at the store.  I always mark on my calendar when the vanilla will be ready.

When your vanilla is ready, remove the bean from the extract, let it dry out for a day or two, then store it in an airtight bottle or ziplock baggie until it's time to make more vanilla.  (Don't forget - next time you use the bean, you'll have to break it in 3 places again, until you eventually end up with just little sticks.)

Then, make yourself something really yummy with your new vanilla!

I did a little math, to see how inexpensive this can be:

I found 5 Madagascar vanilla beans for $5.96 on Amazon (much cheaper than the $16 for one bean at Safeway!).  That works out to $1.20 for one bean.  You can use each bean about 4 times, so that would be 30 cents for one bottle of extract.  I found Seagrams Vodka at Safeway for $8.99 for a 750 ml bottle, costing 35 cents per ounce. There are about 8 bottles of extract per bottle of vodka, making it $1.05 for each. I'm not even going to try to estimate what 1/3 teaspoon of sugar would cost, because it is so negligible.  

Whew!  Are you still with me?  OK, therefore, it would cost  you $1.35 for a 3 ounce bottle of pure vanilla extract if you make it yourself.  In comparison McCormick Pure Vanilla Extract is $4.99 for only one ounce at Safeway.

So you can see what a savings making your own pure vanilla extract can be.  The added benefit is that your homemade extract is so much yummier than the store-bought version and you know exactly what is in it.  And you can feel smug knowing that you're eating better and spending less money to do it, which is always a good thing.  *grin*

Happy eating!