Monday, June 27, 2016

Ad Hoc Improv - Sharing My Improv

I've been so intrigued with the concept of Improv the last few years.  I don't do it as often as I would like, but every time I do it, I have so much fun.  I really enjoy it.  So, I decided that I would try to do more improv this year.  And what better way to spur me on than to have a link-up once a month?  So, welcome to my first post on Ad Hoc Improv quilting.  Visit both Kaja at Sew Slowly and Ann at Fret Not Yourself blogs for more information and to see what others are showing for their improv this month.  They've been doing this for 10 months now.....how did I not notice this before now?  I'm late to the party, as usual.  But, better late than never!

I've dabbled in Improv and liberated, or wonky, quilting for awhile now.  My first example is a quilt top that was started in 2005.  The blocks were made from a pattern, and I showed the improv border I'd started in my last post.  Now it's all done and sewn onto the quilt top.  Yay!


I'm really happy with the way it came out.  It still needs a good press before it goes to the quilter.  And, of course, I need to make a back for it.  


I made too many pieced triangles for the border, because more is better when you don't know how many you need!  I think this will be inserted in the back, once I get it all sewn together.  This is not a great picture, so you'll have to take my word for how good this looks.


These are my Block Lotto blocks for June - improv circles.  They were easy and great fun.  Sewing those wonky curves is sooo easy!  I'd love to win these, so my fingers are crossed. 

I think I need to play with improv pieced circles some more....more ideas keep coming to my mind. 

Finally, the other day I decided to purposefully start a new improv project.  Originally the thought was a baby quilt for my hairdresser, but now I'm not so sure that's what it will be.  It might just be whatever it turns out to be.


Those pieces aren't really big enough to be a baby quilt without a LOT more work.  This might be a smaller wall quilt.  I'll do something with bigger pieces (read: easier and faster) for the baby quilt.  I'm really liking this so far!  My initial plan for the color scheme was bright colors with lots of grey, because that was the request for the baby quilt.  I may add more colors or something else along the way.  Whatever the piece tells me it needs.

I'm also working on my Gwen Marston-inspired Medallion Quilt-along (see my side bar) piece, but that is more secret.  You'll have to wait until Friday for the reveal of the next border....but I'll tell you that it is kinda improv.  At least liberated/wonky, for sure.  I'm furiously working and hoping that I'll have it done in time for the reveal!

Wednesday, June 15, 2016

6-16-16

Welcome to Palindrom Week!  Today's date reads the same forward and backward.  Isn't that cool?

This post is an update on what I've been working on lately, so lots of "this and that".

Not the final layout, just a tease
I've finally gotten all my black and white blocks made, sliced, re-sewn and trimmed to size.  I started this project way back in January 2015.  This was a long-term project...and it really hasn't taken that long!  That kind of surprises me when I realize when I started it - only a year and half.  That's record time for me!  I've decided on the layout, gotten my blocks marked and I'm hoping to get it sewn together soon.

I had a little brainstorm while I was laying these blocks out and came up with an idea to mark my blocks easily.  Remember VHS tapes?  Remember they came with labels for the tapes?  Well, I dug in my tape storage and unearthed some of those labels.


I thought they would make great *free* labels for my quilt blocks, so I don't get the order they're laid out in mixed up when I pick them up to sew them together.

"action shot" of the labels 
Here they are, in use.  I go by row (letter) and block (number).  I always put the labels in the upper left hand corner, so I know which way is "up" on the block.  They work pretty well and the free part is good.  I'm being "green" and utilizing my resources.  Unfortunately, those resources are limited, so I don't know how much longer I can use this particular system.  I may have to find some blank price stickers or something.  Those would work just as well, they're just not free.  Hope you like my little tip!


Here is another quilt top laid out on the design floor.  I'm working on the border of this older UFO that was a block exchange with my friends in Calif. a *few* years ago.  10 or 15 maybe?  I don't even remember!  You can read more about this project here.

 I've been waiting for some border inspiration to strike, and it finally did thanks to Gwen Marston.  She used this border on one of her quilts and I really liked it.  Believe it or not, I still had the scraps from making some of these flowers and they were big enough to use!  Can you tell I never throw away anything?  I tell ya, folks, it's a blessing AND a curse!  *grin*


And....I'm letting myself start a new project!  I'm going to do the 'Basket Case' quilt by Cluck Cluck Sew.  I even got a jelly roll just for this - the first jelly roll I ever bought for me.  The jelly roll had 40 strips and the pattern calls for 42, so I had to add a couple of strips from my stash.  I did such a good job, color-wise, that I can't even tell which two strips those were.


Here are my jelly roll strips all laid out and paired up.  They are all batiks (Hoffman Bali Pops) and the color way is called "Lorikeet".  Very tropical and summery.


And here are my first two blocks.  You make two blocks at a time with this pattern, and it's so easy!  Now if only I wasn't so distracted with all my other projects so I can get back to sewing this!  I just can't seem to sew fast enough to do everything I want.  How about you?  Do you have the same problem?  Do you start or work on multiple projects at a time?  Inquiring minds want to know!

Tuesday, June 07, 2016

Gwennie-Inspired Liberated Medallion Quilt Along - The Start

OK, I'm a day late, but better late than never, right?

I totally spaced on Lori's Liberated Medallion Quilt Along (see it here on her blog Humble Quilts).   When I saw her post yesterday, I remember that I wanted to do this too!

Lori started out the Medallion by giving us the prompt "Basket" for our center block.  And then I saw all the wonderful baskets popping up in Blogland!

So, after I emailed Lori and got permission to play along, I went and found my basket block that is already done.

Basket #1
I had made this last year after my class with Gwen Marston on liberated baskets the previous year.  (see the post on that class here)  Well, it doesn't fit with the other basket blocks I've made for that project - it's too soon to call it a quilt yet!

my baskets as of March 2015
It's a different size and it just doesn't fit with them well.  So, I thought it would be perfect for the Quilt Along.

Basket #2
And then I found one more (in the bottom left in the picture of all the baskets)  It doesn't match very well either - all the others have a more pastel background.

So, I have choices.  I haven't decided quite where I'm going with this, and options are good. 

The print fabric is a vintage late '60's/early '70's one.

Here are my possible fabric choices to go with Basket #1.  I think I need to add in some of the gold/mustard for some spice!  Oooo, shopping!

This is gonna be fun!  I love a liberated quilt and a good QAL too!  And I just had the Medallion class with Gwen this spring to get me started thinking medallions!

The next border's prompt is "Childhood" and I already have some ideas in my head.  Now if it would just cool down enough that I can go upstairs and play in the quilt studio.

Click here to go to Lori's and see all the other baskets that others have made to get started.  I'm humbled by their creativity!

Monday, June 06, 2016

6-6-16

I have so much to share with you!  May was another busy month....and where did it go?   It seemed to just zoom past me!


I took a class that I've been wanting to take for a long time, at the local art gallery.  It was Fabric Printing with Linoleum Blocks.


The actual block carving was much more difficult than I thought it would be.  It was very hard work, and very tough on my arthritic hands and wrist.  As a matter of fact, my wrist (that I sprained 2 years ago) is still giving me pain after 3 weeks.  Above is my first test print on paper.  It showed me that I needed to carve away more background material.


And here is my best print on the fabric.  Not perfect, but OK.  I have 3 prints from the class and now have to decide just what to do with them.  

I learned that this process is not for me!  Always good to know, but a disappointment to me.  I guess I will stick with rubber stamps for printing on fabric.  I have yet to try carving one, but I'm pretty sure it will be easier than the linoleum block.  And I have a lot of purchased ones to play with before I need to worry about carving one, so that's good.

I taught my 3rd bag class 2 weeks ago.  Probably my last one for while.  I had 3 repeat students out of four...they said because they had so much fun in the first class they took that they wanted to do it again.  And we had a lot of fun! 

V's bag

S's bag

C's bag

J's bag

I also made a bag as a gift for my sister, but totally spaced on getting a photo of it.  It was really cute.  You'll have to take my word for it until I can get a photo, I guess!  LOL

I went down south to visit my sister for 5 days.  We had a lot of fun.  Visited a couple of quilt shops, saw my niece and nephew who are both living in the area again, and went to dinner a few times.  But mostly we sewed!  I made a block for the BOM and then some other random things.  


This is the sample block for the June Block Of the Month for the Tacoma Modern Quilt Guild.   It is a pattern by Bonnie Hunter called Pineapple Blossom.  The colors for June are lemon yellow, cerulean blue and white.  

By the way, I found a fun website!  It's called "Color Palettes", and it's a lot of fun to play around with.  And I can see it being very helpful for planning a color scheme for a quilt.  Just pick a color or two and pages and pages of suggested color schemes come up.  Whee!

But mostly we made bags.  Sally is making some to sell, and I was making them "just because".  I've been using Noodlehead's Open Wide pouch tutorial, but decided to use a Missouri Star video this time, for doing the zippers a little differently.  I did use Noodlehead's dimensions for the pouch though, as those are good sizes.  I didn't do the zippers perfectly (wrong both times!)  but the pouches came out good anyway.

smaller pouch
I used some fabric I've been hoarding for years on this one!  It finished at 11 inches wide by 7 inches tall.

and the lining

the larger pouch
And for this pouch I used some new fabric that I love!  (my sister loved it too and had to order some for herself) This one finished at 12 inches wide by 9 inches tall.

And the lining

I don't know if you can see in these photos, but I added ribbons and beads on the zipper tabs, so they're easier to open.

I forgot to get photos of the bags my sister was making.  Her bags were very sophisticated, with linen and batiks.  

We had some fun playing with Zoe, my sister's tuxedo cat.  


Zoe was modeling for us on a vintage quilt that my sister owns.  It only took about 60 photos to get one good one!


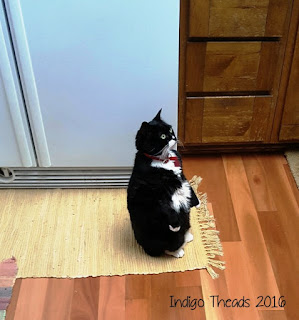
And here is Zoe begging for her breakfast.  She does this sitting up pose all the time.  What a silly kitty!

I hope you have time to be creative this week!