
I'm staying home today rather than going to my guild's workshop this afternoon because I've had a sinus infection and unrelenting headache for 10 days now. I've been to the Dr. twice, started a second antibiotic since the 1st one did nothing for me, and am starting to feel a little better now. I missed my Modern Quilt Guild meeting last night too. I'm kind of pouting about that. But since I'm the hostess for 12 family members for Turkey Day next week, I thought it would be a good thing to feel better by then.
 |
| Batik Strings 25" x 30" |
I started this quilt in a Liberated Strings class with Gwen Marston this past spring, which means I got this finished in less than a year! Yay me! That doesn't seem to happen often around here. I'm calling it Batik Strings for lack of a more inspired name.
I made this quilt with yardage cut into strips instead of using strings, and it was made without a foundation, doing what Gwen calls Block Base construction. It's explained in her books. That was a new technique to me for sewing strings.

A detail shot so you can see some of the fabrics I used. I quilted this one myself. I just free-handed straight lines, no marking. I did use painter's tape for the initial line down the approximate center of the block, but no other markings. I'm pleased with how this came out.

This is my downstairs half-bath where the quilt lives now. I made it to fit into this space, both size-wise and color-wise. Unfortunately I can see now that the quilt isn't too flat. I think the quilting kind of warped it, so I'll have to fix that soon.
The assemblage hanging on the wall on the left is a collaboration piece. I made the ceramic tile, which I felt was less-than-successful, but then my sister took it and incorporated it into one of her assemblages. I think it looks good now. *grin* And I'm really pleased to have a collaboration piece done with my sister!
 |
| Magic Triangle Sample 22" x 22" |
When I went to sandwich this top with the backing and batting, I found I had to take off the outer borders and redo them. They were 'waving in the wind', so I had to get accurate with them. I've learned that sewing a border on and then whacking off the excess fabric rarely makes a nice flat border and that it pays to take a little more time with them.


I believe this design is also called Mary's Triangle, or Shaded 4-Patch.


Here's a detail shot of the center. I used the Magic Triangle template (see below) that I bought at a quilt show. I was so excited to try this template that I came home and immediately made this. I made the smallest blocks that the template would make (2 inches) because I was using some fat 1/8th's I had of reproduction fabrics. There was no actual plan involved in the construction of this top (that I remember) so I'm pleased it turned out so well. This isn't my style any more, but I do appreciate a finished quilt!

A detail shot of the corner. You can see a little of my quilting in this, and also that I used the binding with a flange, which I've learned to love. I think that little bit of red really pops! I had to piece the leftover bits of red to have enough length for the flange, so that's scrappy too.
 |
| One 2 inch block |
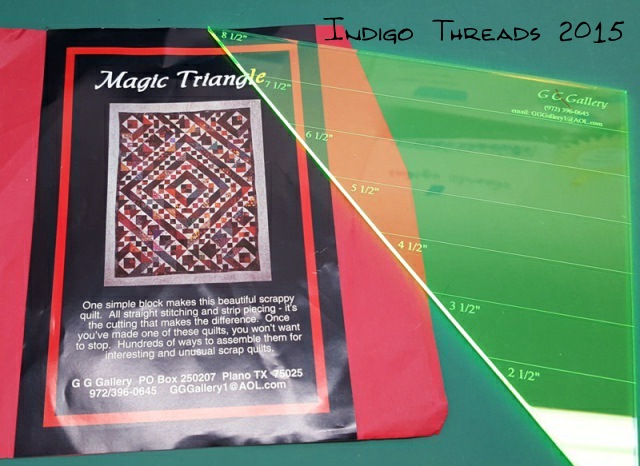
Here is the template that I purchased at a quilt show about 15 (or more) years ago. This doesn't seem to be available anymore, but I did find some other useful links. This technique was developed by Sally Schneider in her book Scrapmania that you can find on Amazon here. You can also find a tool from Sally on her website. (scroll about 1/2 way down the page). There are also instructions on how to make this block without a spiffy template on Sew Fresh Quilts blog. If you Google 'Mary's Triangle quilts', there are many, many images of all the different ways you can set this block together to make great quilts! Some day I want to do this pattern/technique again!

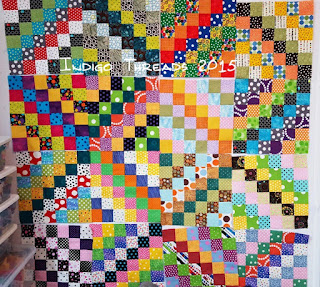
I haven't decided what project I want to focus on first, so I pulled out my Scrappy Trips project that I'm doing with all my dots fabrics. I've got 20 blocks done now. Still have about 50 blocks to do to make a quilt that fits our queen-sized bed. Kind of an intimidating thought! So, this is obviously going to be a longer-term project that I will work on as I'm inspired to.

We got our first snowfall last weekend! We only got about an inch total, and most of it was melted by the time I got this photo. We've had some wild weather the last few weeks. Tuesday we had a huge wind storm and rain storm. We lost power for about 3 hours. Now there are fir boughs all over the deck and back yard, but luckily no other damage to us. We're supposed to get down into the 20's tonight. Yikes! Cold!
I hope all of my U.S. readers have a wonderful Thanksgiving Day. I know I'm thankful for all we have, including a loving family. Wishing you and yours a happy holiday!